Is 16.7 million colors enough?
Majority of our devices today can display 16.7 million colors. This may sound as a lot but sometimes human eye can notice a difference between two neighboring colors. I have encountered this problem while creating some fractal images. The solution to the limitation is usage of dithering. This article describes the problem and presents a simple solution.
Introduction
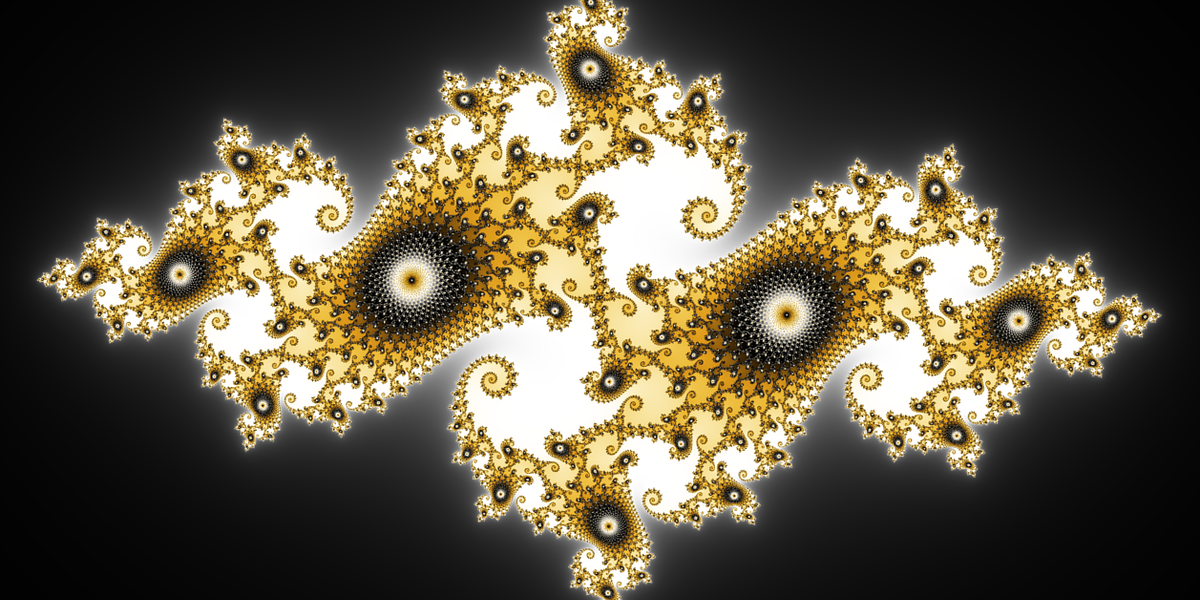
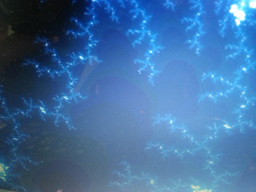
Recently I have been creating some beautiful fractal images and I have noticed that sometimes I could see slight edges in long smooth color gradients. Once I noticed the problem I could see it in nearly all smooth gradients and it really bothered me. Take a look at Figure 1. The first image is original fractal and the second is a detail of the bottom right area. The second picture has an enhanced section to see the problem more clearly.
First, I thought that it is some kind of bug in my implementation but when I checked the colors on the left and right of the visible edge they were neighbors (#040404 and #050505). This means that there are no more displayable colors in between them. Then I thought that maybe my laptop have just too old display so I have checked the images on my phone and tablet but it was pretty much the same there as well.
I also wanted to print the fractal images as large posters and this problem would be most likely present in the prints as well, possibly even enhanced. The re-sampling from RGB to CMYK and sharpening before printing can make it only worse.
Human perception system is to blame
The problem occurs only in long smooth gradients where there are large areas of neighboring colors. Human eye is trained to recognize edges and when there are large areas of solid color with a slight edge between them the eye will actually enhance the edge to see it more clearly. This effect is well known and it is called Mach bands.
Look at one of the rectangles in the middle of Figure 2. Do you see that the rectangle is slightly lighter on the left and slightly darker of the right? Well, that's just an illusion because they all have solid color. This is a result of the edge enhancement of human eye. Mach band effect works for edges in any orientation and color.
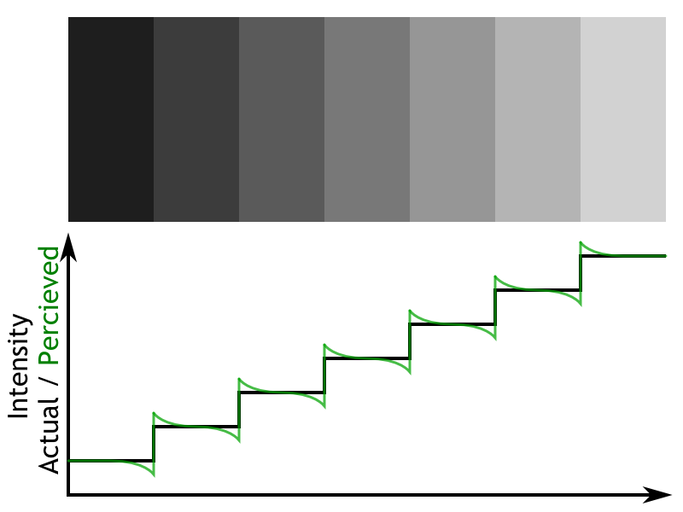 Figure 2: Mach Bands illusion. Each rectangle has solid color but it is perceived as a gradient because the edges are enhanced by human visual system.
Too few colors
The observed problem is simply caused by not having enough colors to make smooth gradient. Nowadays the standard number of colors is 16.7 million. This number is coming from 24 bit depth, 224 = 16 777 216. That might sound like a lot but in a gradient between black and white we have only 254 other colors.
Theoretically, in between any two colors there can be maximum of 3*256 - 2 = 766 other colors. In reality it is usually much less because colors are not that different and some "steps" happen at the same location like in case of black-white gradient.
Just for fun I wrote a little script shown in Code listing 1 to count average number of colors in a gradient between two random colors. For gradient length of 1000 steps the average is around 230 and the maximum is 582. For gradient length of 10 000 steps the average is around 250 and the maximum is 674.
1
2
3
4
5
6
7
8
9
10
11
12
13
14
int countColorsInGradient(Color from, Color to, int gradientSteps) {
	int colors = 1;  // The first color.
	Color last = from;

	for (int i = 0; i < gradientSteps; i++) {
		Color interp = from.Lerp(to, (double)i / (gradientSteps - 1.0));
		if (last != interp) {
			last = interp;
			colors += 1;
		}
	}

	return colors;
}
Larger color depth is here to help, or not
It is known that 24 bit depth is not enough and human eye can sometimes distinguish the individual shades. For those cases we have 30/36/48 bit depths. They would definitely get rid of any smooth gradient artifacts, but this approach requires two critical assumptions:
- All viewing applications (web browser, print driver) supports images with 30/36/48 bit color depths.
- All devices are able to display 30/36/48 bit color depths.
While the first one is just software problem and can be solved somehow easily and cheaply the second point is actually a huge problem. Try to find a consumer computer screen, laptop, phone, or tablet with 30 bit color depth. Only recently the 24 bit depth become somewhat standard and you can still find devices with 16 bit color depth.
High color depth is nothing new. It has been around for decades but it was never adopted for masses mostly because of its cost for very little benefit. Unfortunately, higher color depth was not option for me because of three reasons:
- The printing company for the posters I wanted to make does not support more than 24 bit color depth.
- I wanted to offer downloads of the images as desktop backgrounds and nearly nobody has more than 24 bit color depth display device nowadays.
- Finally, the support for higher color depths in my framework (C#, .NET) is very limited and it's pain to work with it.
Figure 3 shows one more interesting problem. Notice that some boundaries are more visible than others. This is caused by different locations of the steps in red, green, and blue channels. The step is more visible when green and blue channel change at the same time.
Dithering
The solution to the problem is usage of technique called dithering. Dithering applies a form of noise to randomize quantization error. A typical example of dithering is conversion of gray-scale image to black and white.
Instead of standard rounding of the resulting float to an integer in range of 0 to 255 we perform randomized rounding to the neighboring integer with probability based on the distance to the neighbors. For example, if the color intensity is 128.6 then the probability of rounding down to 128 is 40% and up to 129 is 60% — the fractional part represents the probability.
I use 4 byte floats to represents color components red, green, blue, and opacity. Code listing 2 shows the dithering function that takes color as a float in range from 0 to 1 and converts it to an integer in range from 0 to 255 using described dithering technique. The function takes a pseudo-random generator as an argument to drive the random decisions. Applying this function on every pixel converts the image to color depth of 24 bit but without loss of fractional shades. Dithering is not used on opacity component.
1
2
3
4
5
6
7
8
9
10
11
12
byte dither(float color, Random rand) {
	double c = color * 255.0;  // Convert color from [0-1] to [0-255].
	double cLow = Math.Floor(c);

	// Probability of rounding up is equal to the fractional part.
	if (rand.NextDouble() < c - cLow) {
		return (byte)Math.Ceiling(c);
	}
	else {
		return (byte)cLow;
	}
}
Code listing 3 shows an example of conversion of data to an image using dithering.
The function uses direct pointers in unsafe mode to write data directly to the Bitmap object.
This is the fastest way how to access the Bitmap.
1
2
3
4
5
6
7
8
9
10
11
12
13
14
15
16
17
18
19
20
21
22
23
24
25
26
27
28
29
30
unsafe Bitmap createDitheredImage(Color[,] data) {
	int wid = data.GetLength(1);
	int hei = data.GetLength(0);
	var bmp = new Bitmap(wid, hei, PixelFormat.Format32bppArgb);
	BitmapData bmpData = bmp.LockBits(new Rectangle(0, 0, wid, hei),
				ImageLockMode.WriteOnly, bmp.PixelFormat);

	byte* imgPtr = (byte*)bmpData.Scan0;
	var rand = new Random();

	for (int y = 0; y < hei; y++) {
		int baseStride = y * bmpData.Stride;

		for (int x = 0; x < wid; x++) {
			int baseI = baseStride + x * 4;
			Color color = data[y, x];

			imgPtr[baseI] = dither(color.B, rand);
			imgPtr[baseI + 1] = dither(color.G, rand);
			imgPtr[baseI + 2] = dither(color.R, rand);

			// Alpha does not need to be dithered.
			imgPtr[baseI + 3] = (byte)Math.Round(255 * color.A);

		}
	}

	bmp.UnlockBits(bmpData);
	return bmp;
}
If you think about the dithering process it actually makes a lot of sense. Imagine a large area of color intensity of 128.6 displayed using the dithering algorithm on high resolution display. The perceived color will be roughly 128.6 because 40% of pixels will have intensity 128 and 60% will have 129. The randomness is the key to avoid any noticeable artifacts.
In theory, if you would have a display of infinite density you would need just three colors — the primary ones. All other colors could be made up using dithering.
Cheaper displays that have only 16 bit color depth are simulating other colors by pulse-width modulation which can be imagined as a dithering in time rather than in space. Every pixel is blinking between two neighboring colors very fast and the length of each color again depends on the actual color intensity. In fact, this technique is used to control intensity of some LED lights.
Results
The results are absolutely amazing! All artifacts are completely gone and I have not been able to find a single flaw. Check out Figure 4 for comparison. If you still see some artifacts then you are probably not viewing the images in their native resolution. Re-sampling of the images introduces the artifacts again because it damages the dithering pattern.
Not dithered. 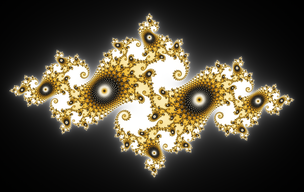
Dithered. 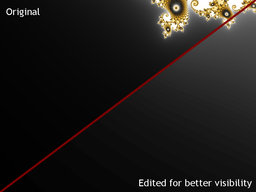
Not dithered. 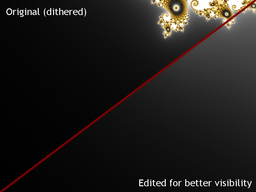
Dithered. 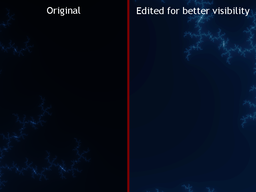
Not dithered. 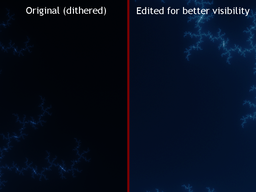
Dithered. 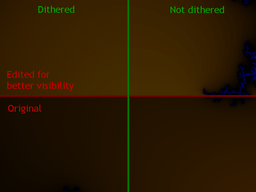
Another example. 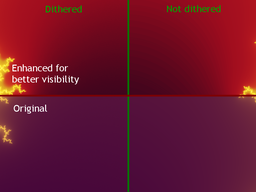
And the last example.
Interestingly enough, sometimes you don't have to see the edges but you just feel that it's not smooth. I can observe this phenomenon in the last image in the results — the purple one.
Finally, I would like to answer the question from the title of this article:
Is 16.7 million colors enough?
No, it is not!
Techniques like described dithering are cool but they are just tricks how to deal with the problem of having not enough colors. And the tricks are not without its problems. So there is a problem otherwise no tricks would be needed.
And I don't mean just more colors, I would like have larger color space — gamut. People often do not realize how limited colors are on our devices are. There is xvYCC color space that has 1.8 larger gamut than sRGB. I hope that in near future we will start to see such advances in displays!
Did you also encounter similar problem when 24 bit color depth was simply not enough? Let me know down below in the comments!
 Figure 5: Photo of printed poster. The details are just amazing and all gradients are absolutely smooth. Original image rendered at resolution of 100 mega pixels (photo taken with my phone).
Pros and cons of dithering method
- Pros
-
- Ability to represent more colors than available. The new colors are of course always between two existing colors. It is not possible to create completely new color.
- Simple implementation. Described dithering is a simple change that does not hurt performance.
- No need for higher color depth.
- Cons
-
- Dithered images have to be saved using loss-less method such as PNG. Lossy methods like JPEG will get rid of the dithering pattern and the effect is lost.
- Larger file size. I am observing an increase around 10% to 40% (PNG encoding). It highly depends on the size of problematic area. This actually nicely shows that there is more entropy, thus, more information saved in the dithered image.
- Re-sampling (resizing) the image damages the dithering pattern and the effect is suppressed or lost. This means that you should present dithered images in native resolution if possible.
