Conway's Game of Life on GPU using CUDA
Chapter 5: Display
Previous chapters were talking about efficiency of evaluation of Conway's Game of Life on both CPU and GPU. The GPU was found to be superior reaching speedups of 680× over the serial CPU algorithm.
This chapter talks about effective implementation of visualization of life world. The effectiveness of visualization comes from usage of interoperability between OpenGL and CUDA. CUDA is directly used to effectively copy data from GPU memory to GPU display buffer to avoid any CPU-GPU data transfer.
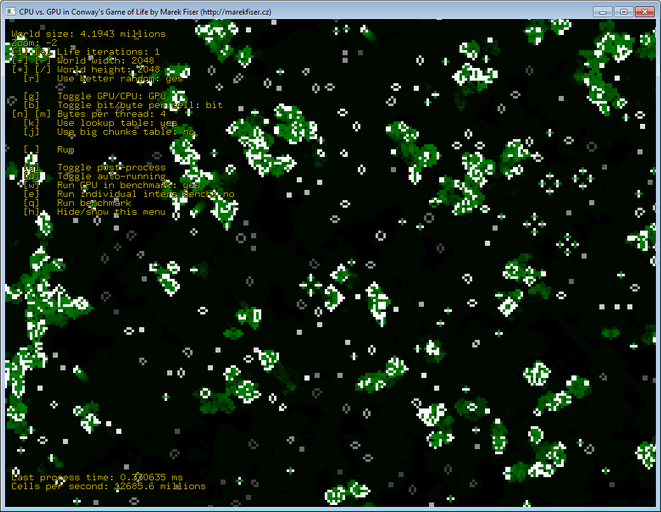
This project uses open source libraries Freeglut and GLEW. Freeglut allows to create and manage windows with OpenGL context on a wide range of platforms. It and also handles mouse or keyboard events. GLEW provides OpenGL core and extension functionality in a single header file. The user interface is show in Figure 22.
OpenGL and CUDA interoperability
As mentioned in introduction, interoperability between OpenGL and CUDA is used to render large scale world in very fast way. This project was made for CUDA class and our professor was suggesting us to allocate a texture with the same size as the life world and just render it. This simple solution works for smaller life worlds but it is waste of resources for bigger worlds.
After allocating, binding, and setting up the OpenGL buffers for texture, a function cudaGraphicsGLRegisterBuffer registers OpenGL buffer for CUDA usage.
While a pixel buffer object (PBO) is registered to CUDA, it can't be used as the destination for OpenGL drawing calls.
But in this particular case OpenGL is only used to display the content of the PBO, specified by CUDA kernels, so we need to register/unregister it only once.
1
2
3
4
5
6
7
8
9
10
11
12
13
14
15
16
17
18
19
20
21
22
23
24
25
26
bool initOpenGlBuffers(int width, int height) {
	// Free any previously allocated buffers
	// ... code skipped

	// Allocate new buffers.
	h_textureBufferData = new uchar4[width * height];

	glEnable(GL_TEXTURE_2D);
	glGenTextures(1, &gl_texturePtr);
	glBindTexture(GL_TEXTURE_2D, gl_texturePtr);
	glTexParameteri(GL_TEXTURE_2D, GL_TEXTURE_WRAP_S, GL_CLAMP);
	glTexParameteri(GL_TEXTURE_2D, GL_TEXTURE_WRAP_T, GL_CLAMP);
	glTexParameteri(GL_TEXTURE_2D, GL_TEXTURE_MAG_FILTER, GL_NEAREST);
	glTexParameteri(GL_TEXTURE_2D, GL_TEXTURE_MIN_FILTER, GL_NEAREST);
	glTexImage2D(GL_TEXTURE_2D, 0, GL_RGBA8, width, height, 0, GL_RGBA,
		GL_UNSIGNED_BYTE, h_textureBufferData);

	glGenBuffers(1, &gl_pixelBufferObject);
	glBindBuffer(GL_PIXEL_UNPACK_BUFFER_ARB, gl_pixelBufferObject);
	glBufferData(GL_PIXEL_UNPACK_BUFFER_ARB, width * height * sizeof(uchar4),
		h_textureBufferData, GL_STREAM_COPY);

	cudaError result = cudaGraphicsGLRegisterBuffer(&cudaPboResource, gl_pixelBufferObject,
		cudaGraphicsMapFlagsWriteDiscard);
	return result == cudaSuccess;
}
Texture generation
CUDA is used to effectively transfer life cells data from buffers to texture. Thanks to OpenGL interoperability this is very easy as you can see in Code listing 15.
First, cudaPboResource that holds CUDA specific reference for the texture buffer is mapped.
This is similar to glBindBuffer in OpenGL.
Then, a pointer to mapped data is received.
This pointer is then passed to a CUDA kernel that writes data to it as if it was normally allocated memory.
After the kernel is finished, un-mapping of the CUDA resource is necessary otherwise OpenGL cannot perform any operations with the buffer.
1
2
3
4
5
6
7
8
9
10
11
12
void displayLife() {
	cudaGraphicsMapResources(1, &cudaPboResource, 0);
	size_t num_bytes;
	cudaGraphicsResourceGetMappedPointer((void**)&d_textureBufferData,
		&num_bytes, cudaPboResource);

	runDisplayLifeKernel(gpuLife.getBpcLifeData(), worldWidth, worldHeight,
		d_textureBufferData, screenWidth, screenHeight,
		translate.x, translate.y, zoom, postprocess, cyclicWorld, true);

	cudaGraphicsUnmapResources(1, &cudaPboResource, 0);
}
The display kernel itself is shown in Code listing 16. The CUDA kernel is quite universal and can handle following:
- it is able to switch between simple and cyclic world renderings,
- it is able to read both byte-per-cell or bit-per-cell formats,
- it supports zoom and renders in pixel precision,
- it does automatic multi-sampling if zoomed out,
- it draws clever world boundaries, and
- it simulates evolving world by comparing current state with previous state of the world and adjusting colors accordingly.
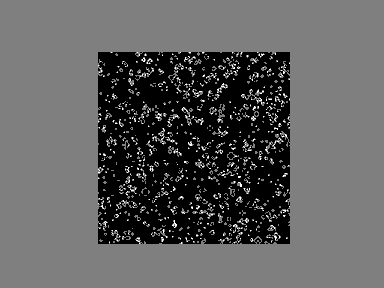
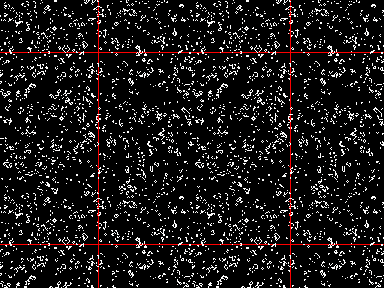
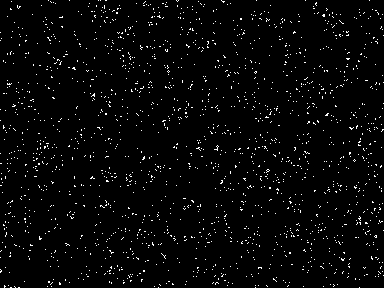
Cyclic life rendering is very natural since the life world is already cyclic as described in the Chapter 1: Introduction. Because of that, cyclic rendering has no seams and the life world seems truly infinite. Figure 23 shows comparison between non-cyclic and cyclic renderings.
Ability to read both byte-per-cell or bit-per-cell formats of the life world is handy to avoid any unnecessary conversions of data formats. Conversion is handled right in the display kernel with very little overhead.
Zooming is done just by simple multiplication of the coordinates by zoomFactor.
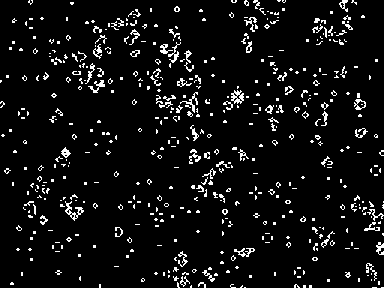
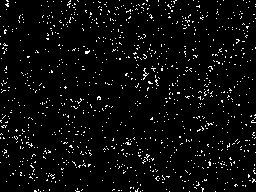
Figure 24 shows zoomed-in, native and zoomed-out screenshots of a life world.
Multi-sampling technique is used to average colors of all life cells in every pixel if the world is zoomed-out.
Drawing of life boundaries is minor thing but if cyclic rendering is turned on it is impossible to know where world boundaries are. The boundary is rendered cleverly – it does not hide alive cells, it is shown only over dead cells.
1
2
3
4
5
6
7
8
9
10
11
12
13
14
15
16
17
18
19
20
21
22
23
24
25
26
27
28
29
30
31
32
33
34
35
36
37
38
39
40
41
42
43
44
45
46
47
48
49
50
51
52
53
54
__global__ void displayLifeKernel(const ubyte* lifeData, uint worldWidth,
		uint worldHeight, uchar4* destination, int destWidth, int detHeight,
		int2 displacement, double zoomFactor, int multisample,
		bool simulateColors, bool cyclic, bool bitLife) {

	uint pixelId = blockIdx.x * blockDim.x + threadIdx.x;

	int x = (int)floor(((int)(pixelId % destWidth) - displacement.x) * zoomFactor);
	int y = (int)floor(((int)(pixelId / destWidth) - displacement.y) * zoomFactor);

	if (cyclic) {
		x = ((x % (int)worldWidth) + worldWidth) % worldWidth;
		y = ((y % (int)worldHeight) + worldHeight) % worldHeight;
	}
	else if (x < 0 || y < 0 || x >= worldWidth || y >= worldHeight) {
		destination[pixelId].x = 127;
		destination[pixelId].y = 127;
		destination[pixelId].z = 127;
		return;
	}

	int value = 0;  // Start at value - 1.
	int increment = 255 / (multisample * multisample);

	if (bitLife) {
		for (int dy = 0; dy < multisample; ++dy) {
			int yAbs = (y + dy) * worldWidth;
			for (int dx = 0; dx < multisample; ++dx) {
				int xBucket = yAbs + x + dx;
				value += ((lifeData[xBucket >> 3] >> (7 - (xBucket & 0x7))) & 0x1) * increment;
			}
		}
	}
	else {
		for (int dy = 0; dy < multisample; ++dy) {
			int yAbs = (y + dy) * worldWidth;
			for (int dx = 0; dx < multisample; ++dx) {
				value += lifeData[yAbs + (x + dx)] * increment;
			}
		}
	}

	bool isNotOnBoundary = !cyclic || !(x == 0 || y == 0);

	if (simulateColors) {
		// Post-processing is described in next section ...
	}
	else {
		destination[pixelId].x = isNotOnBoundary ? value : 255;
		destination[pixelId].y = value;
		destination[pixelId].z = value;
	}
	destination[pixelId].w = value;
}
Texture post-processing
Black and white rendering of Conway's Game of Life is classic but I did not like it. Since the CUDA kernel offers full control of assigned colors to each pixel I decided to make it more alive by some simple post-processing.
The alpha channel destination[pixelId].w is used to store previous cell value.
Based on this information it is possible to distinguish between following four states:
- was alive and is alive (stayed alive),
- was alive and is dead (died),
- was dead and is dead (stayed dead), and
- was dead and is alive (born).
This information is used to color the cells in following way:
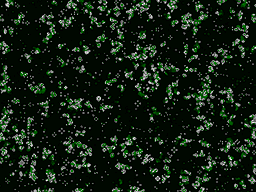
- every born cell is white,
- every alive cell gets darker over time until it is dark gray, and
- every cell that dies leaves dark green trace that gets darker over time until it gets black.
Figure 25 shows those rules written in the CUDA kernel code which is part of Code listing 16. The effect of described post-processing can be seen in Figure 25.
This effect was made just for fun and due to way how previous states are saved; any movement or zoom of the world resets the post-processing.
1
2
3
4
5
6
7
8
9
10
11
12
13
14
15
16
17
18
19
20
21
22
23
24
25
26
27
28
29
30
31
32
33
34
35
36
37
38
39
40
41
42
43
44
45
46
	if (simulateColors) {
		if (value > 0) {
			if (destination[pixelId].w > 0) {
				// Stayed alive - get darker.
				if (destination[pixelId].y > 63) {
					if (isNotOnBoundary) {
						--destination[pixelId].x;
					}
					--destination[pixelId].y;
					--destination[pixelId].z;
				}
			}
			else {
				// Born - full white color.
				destination[pixelId].x = 255;
				destination[pixelId].y = 255;
				destination[pixelId].z = 255;
			}
		}
		else {
			if (destination[pixelId].w > 0) {
				// Died - dark green.
				if (isNotOnBoundary) {
					destination[pixelId].x = 0;
				}
				destination[pixelId].y = 128;
				destination[pixelId].z = 0;
			}
			else {
				// Stayed dead - get darker.
				if (destination[pixelId].y > 8) {
					if (isNotOnBoundary) {
					}
					destination[pixelId].y -= 8;
				}
			}
		}
	}
	else {
		destination[pixelId].x = isNotOnBoundary ? value : 255;
		destination[pixelId].y = value;
		destination[pixelId].z = value;
	}

	// Save last state of the cell to the alpha channel that is not used in rendering.
	destination[pixelId].w = value;
Texture drawing
Finally, Code listing 18 shows actual code for drawing the texture using OpenGL. It is done by drawing a single quadrilateral across whole screen with correct texture coordinates.
Somebody may criticize the usage of OpenGL fixed pipeline functions for drawing a quad but hey, it's just a single quad. More interesting code is the one that actually writes the informations to the texture. This is described in next section.
1
2
3
4
5
6
7
8
9
10
11
12
13
14
15
16
17
18
19
20
21
22
void drawTexture() {
	glColor3f(1.0f, 1.0f, 1.0f);
	glBindTexture(GL_TEXTURE_2D, gl_texturePtr);
	glBindBuffer(GL_PIXEL_UNPACK_BUFFER_ARB, gl_pixelBufferObject);

	glTexSubImage2D(GL_TEXTURE_2D, 0, 0, 0, screenWidth, screenHeight,
		GL_RGBA, GL_UNSIGNED_BYTE, 0);

	glBegin(GL_QUADS);
	glTexCoord2f(0.0f, 0.0f);
	glVertex2f(0.0f, 0.0f);
	glTexCoord2f(1.0f, 0.0f);
	glVertex2f(float(screenWidth), 0.0f);
	glTexCoord2f(1.0f, 1.0f);
	glVertex2f(float(screenWidth), float(screenHeight));
	glTexCoord2f(0.0f, 1.0f);
	glVertex2f(0.0f, float(screenHeight));
	glEnd();

	glBindBuffer(GL_PIXEL_UNPACK_BUFFER_ARB, 0);
	glBindTexture(GL_TEXTURE_2D, 0);
}
